Schlage Deadbolt Home Assistant Integration
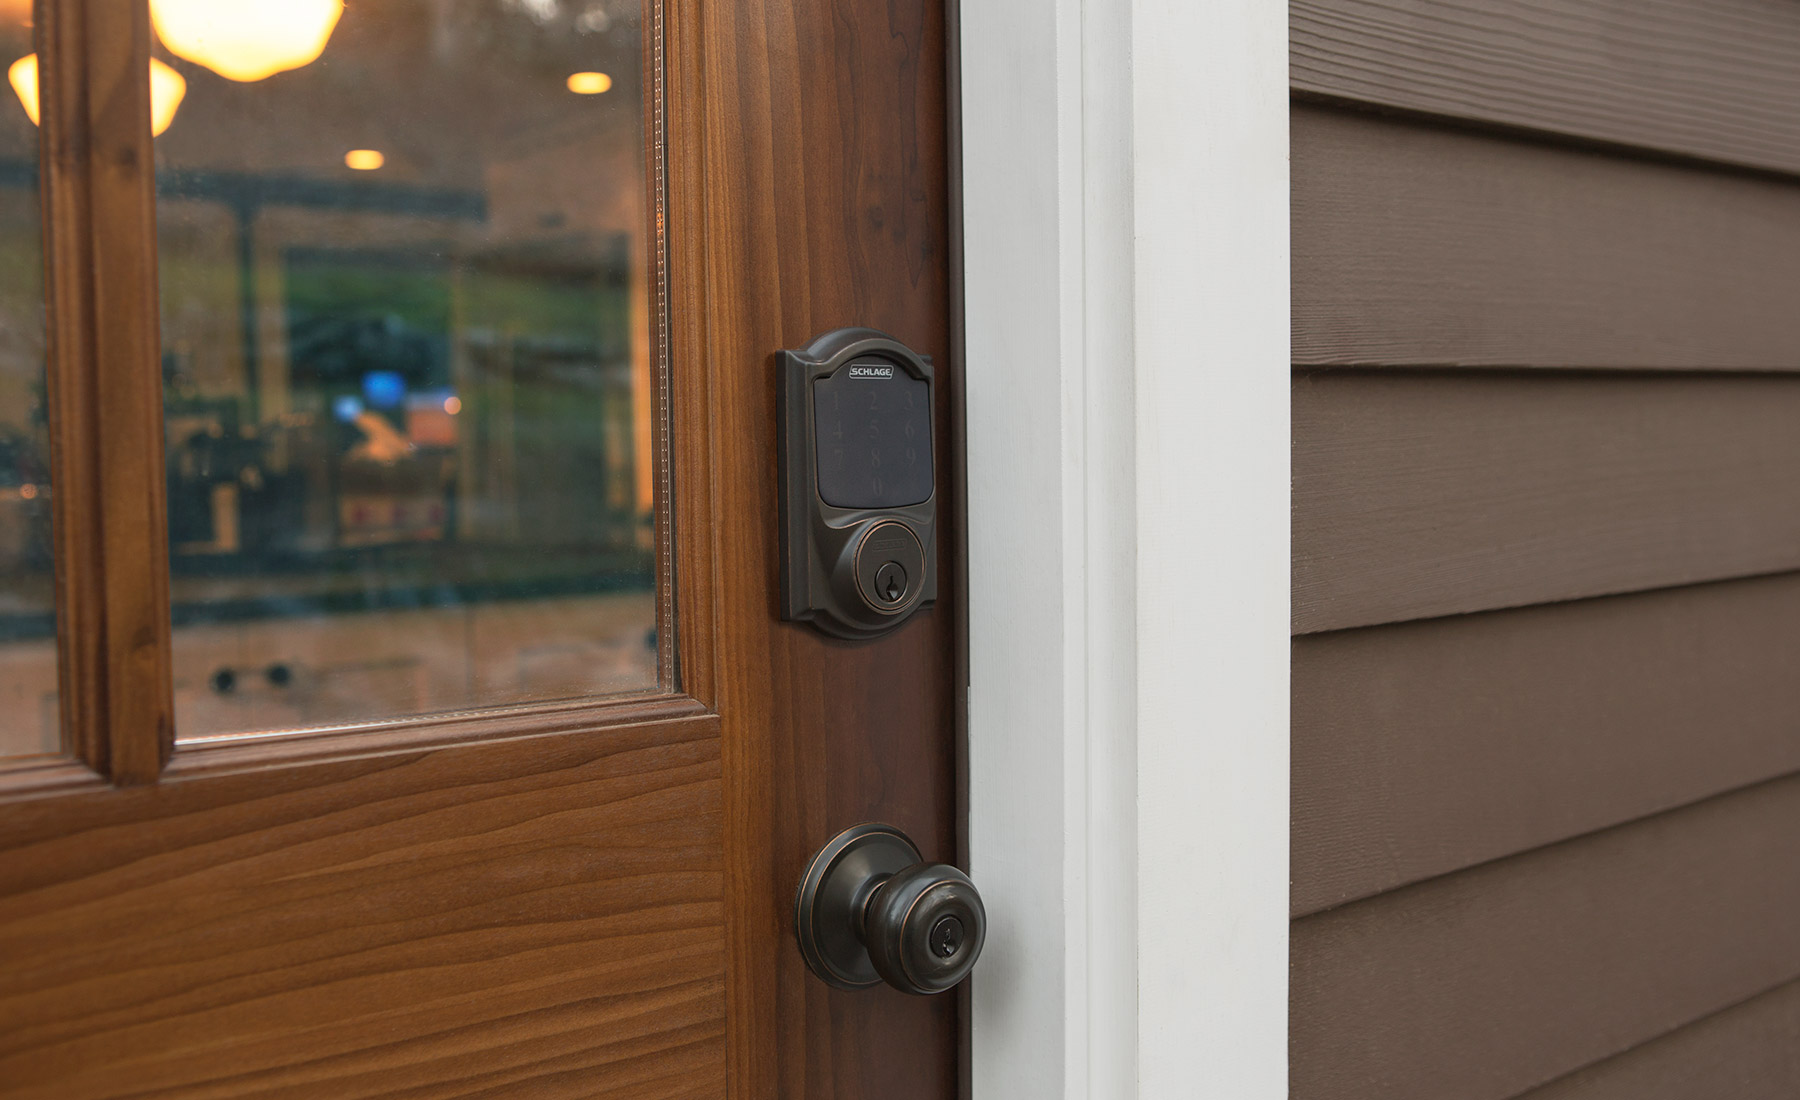
While most of my home automation projects have provided some learning opportunities and have been enjoyable, not all of them have proven to be particularly useful or impactful. Upgrading to a smart deadbolt was, and if you’re playing with home automation I highly recommend installing one. In particular I recommend the SCHLAGE Connect Smart Deadbolt. (FYI: I do not receive any compensation or benefit from reviews, recommendations, or links.)
Benefits:
- I don’t get locked out of the house. Recently my 2 year old son accidentally locked me in the backyard. I simply went to the front door and punched in my code on the keypad.
- When we leave the house, a simple button press engages the deadbolt - no fumbling with keys.
- Family showed up at the house while I was out running errands. I unlocked the door remotely for them to wait inside.
- We give others unique access codes for access (in particular a couple of babysitters/nannies that assist with childcare). We can:
- receive alerts when others unlock the door with their unique codes
- restrict days/times when certain codes are active
- Add the lock to automations (such as a “bedtime” routine that includes ensuring the house is locked up).
Step 1: Manual installation of lock on the door
Follow the manual. I blog about the automation parts.
Step 2: Connect the lock to the ZWave network
Again, I’m mostly going to refer you to the manual for two reasons. First, it’s straightforward. Second, the steps will depend on which on which Home Assistant ZWave integration you are using, which I assume you are familiar with.
The important step here is to ensure you are adding the lock as a “Secure Node”, “Secure Join”, or select “Force Security”. If someone was to tinker with your automated lights because you didn’t encrypt the connection, that usually would be nothing more than an annoyance. But for your door locks, you need to ensure that the connection is secure for your family’s safety.
Bonus tip. If you use a password manager (like KeePass), save the DSK and default programming codes there during this install process. If you ever need to re-pair or reset the device (such as if you need to unpair due to not enabling security initially), it will be easier to pull these from your password manager than opening the lock to find the sticker or remembering where you put the manual.
Step 3: Install Keymaster in Home Assistant
The Keymaster integration is where the real integration benefit comes from.
From HACS (Home Assistant Community Store), install the following FrontEnd elements:
- fold-entity-row
- number box
- auto-entities
- card-tools
Under HACS Integrations, select “Explore & Download Repositories”. Search for and install “Keymaster”.
Restart Home Assistant
In Home Assistant, “Settings > Devices & Services > ADD INTEGRATION”.
Search for Keymaster, and select your configuration options.
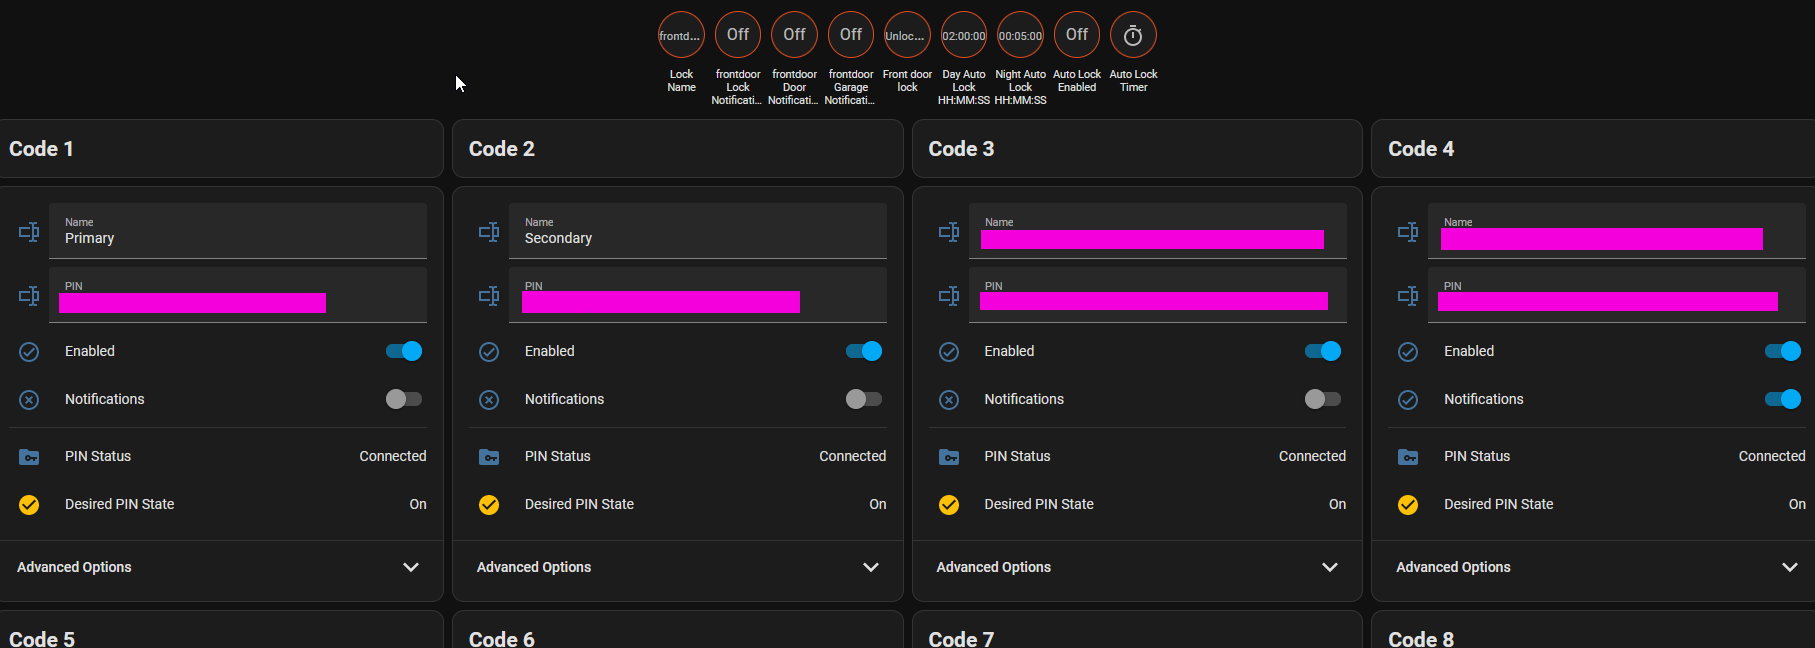
For the configuration, the Schlage deadbolt has 10 code slots, starting with slot 0. (0-9)
SSH to Home Assistant (or use a file explorer integration). After saving the configuration, you should see a new directory for the lock under “config/packages/keymaster”
Step 4: Create the dashboard entry
The integration saves a file with the dashboard configuration.
Navigate to “config/packages/keymaster/
The contents of this should be pasted into an existing dashboard or a new dashboard created just for this lock.
You can then Lock / Unlock and manage codes all from this dashboard: