
Home Assistant Setup Part 3
In part 1, I covered how I installed Home Assistant in a VM on my Proxmox server.
In part 2, I covered adding SSH access and a custom SSL certificate with automated certificate updates.
In part 3 we add automated backups to a local NAS.
Automated Backups
There is built in functionality for creating backups. These are stored locally. This was great when needing to revert bad changes. My mistake was I initially ran Home Assistant on a Raspberry Pi and these backups were stored locally on the same SD card. Now I highly recommend running Home Assistant on anything other than an SD card. Regardless, your backups should not be stored on the same drive Home Assistant is running on. There are many add-ons available for automatically sending backups to Google Drive, OneDrive, DropBox, and other cloud stores. If you haven’t picked up on my home automation theme so far, I like local control. I do use all 3 of those services, but in general I am rather picky about when and what I send out from the “Harps Cloud” to other clouds.
I am running a QNAP NAS locally, which is ideal for these backups for my needs. If I were to lose both my NAS and my Home Assistant hardware at the same time, I’m dealing with much larger headaches than caring about my home automation projects. Plus, with this blog I have all the steps I need to recreate my Home Assistant setup.
On my NAS I added a user, “homeassistant” with only Microsoft Networking permissions and a shared directory also called “homeassistant”. SSH to home assistant and edit the secrets.yaml file, adding this user and password:
qnap_share_username: "homeassistant"
qnap_share_password: "*****************"
In Home Assistant, go to the add-on store. There’s a list of add-ons available, but not what I need. In the top right of that screen is a “3 dot menu”. From that menu select “repositories” and add https://github.com/thomasmauerer/hassio-addons
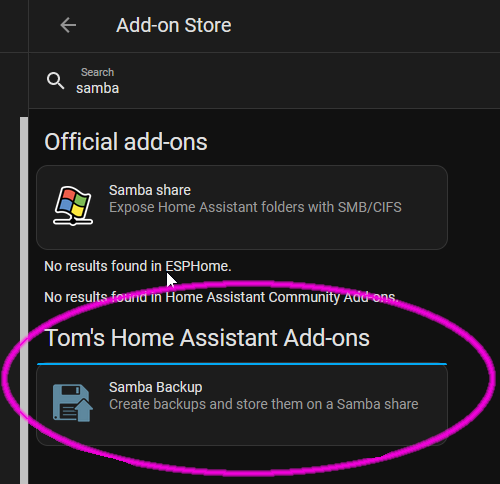
Once Added, that repository and its add-ons will be listed in the add-on store. Scroll to the bottom to see it, or search for “Samba”, and install the “Samba Backup” add-on.
Here’s my configuration for that add-on:
host: {NAS IP Address}
share: homeassistant
target_dir: backups
username: "!secret qnap_share_username"
password: "!secret qnap_share_password"
keep_local: "30"
keep_remote: "30"
trigger_time: "04:00"
trigger_days:
  - Mon
  - Tue
  - Wed
  - Thu
  - Fri
  - Sat
  - Sun
exclude_addons: []
exclude_folders: []
This should create a backup every morning. To test our configuration, you can call a service from the Home Assistant Developer tools, or create a button on one of your dashboards to perform a backup when pressed. I also wanted to see the status of my backups ongoing, so I created a new Dashboard for this button as well as a status card.
On a new or existing dashboard add a manual card to trigger a backup:
name: Manual Samba Backup
icon: mdi:database
type: button
tap_action:
  action: call-service
  service: hassio.addon_stdin
  service_data:
    addon: 15d21743_samba_backup
    input: trigger
show_state: true
Add a second manual card for the status:
entities:
  - entity: sensor.samba_backup
    icon: 'mdi:file-replace-outline'
    name: Backup Status
  - attribute: backups_local
    entity: sensor.samba_backup
    icon: 'mdi:file-outline'
    name: Local Backups
    type: attribute
  - attribute: backups_remote
    entity: sensor.samba_backup
    icon: 'mdi:file-move-outline'
    name: Remote Backups
    type: attribute
  - attribute: total_backups_succeeded
    entity: sensor.samba_backup
    icon: 'mdi:file-check-outline'
    name: Succeded Backups
    type: attribute
  - attribute: total_backups_failed
    entity: sensor.samba_backup
    icon: 'mdi:file-cancel-outline'
    name: Failed Backups
    type: attribute
  - attribute: last_backup
    entity: sensor.samba_backup
    icon: 'mdi:file-clock-outline'
    name: Last Backup
    type: attribute
show_header_toggle: false
title: Samba Backup
type: entities
Per the Add-On instructions
Whenever Home Assistant restarts, you will lose the attributes of the Samba entity which means the backup job will never trigger. You must add an automation to restore the sensor after a reboot
Under Settings > Automations > Create New > Edit in Yaml, enter:
alias: Restore Samba sensor on startup
description: ''
trigger:
  - platform: homeassistant
    event: start
condition: []
action:
  - service: hassio.addon_stdin
    data:
      addon: 15d21743_samba_backup
      input: restore-sensor
mode: single
I also added an automation notification if the backup sensor is ever not in a good state:
alias: Samba Backup Notifications
description: ""
trigger:
  - platform: state
    entity_id: sensor.samba_backup
condition:
  - condition: not
    conditions:
      - condition: state
        entity_id: sensor.samba_backup
        state: IDLE
      - condition: and
        conditions:
          - condition: state
            entity_id: sensor.samba_backup
            state: RUNNING
      - condition: and
        conditions:
          - condition: state
            entity_id: sensor.samba_backup
            state: SUCCEEDED
action:
  - service: logbook.log
    data:
      name: Samba Backup
      message: "{{ states('sensor.samba_backup')|lower }}"
  - service: persistent_notification.create
    data:
      title: Backup Notification
      message: Samba backup {{ states('sensor.samba_backup')|lower }}.
      notification_id: samba_notice
mode: single
This all resulted in the following dashboard:
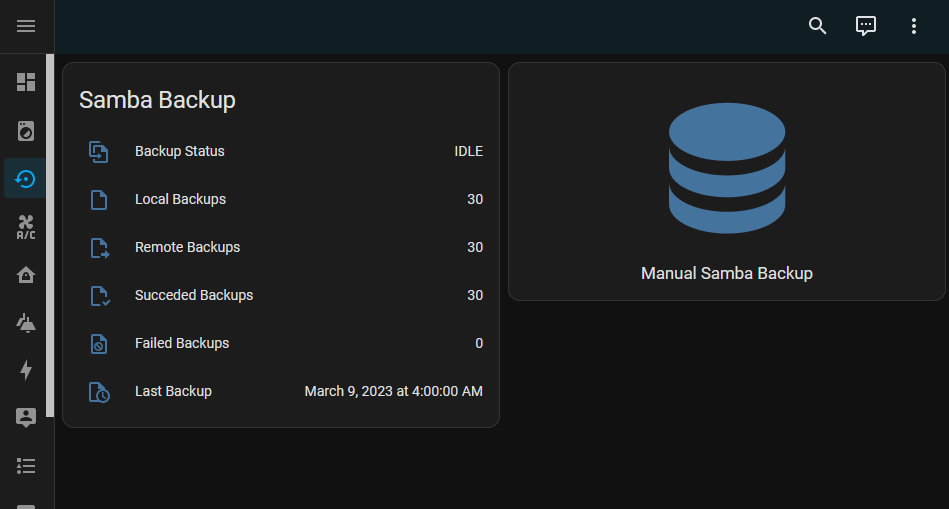
After clicking on the “Manual Samba Backup” button, I checked the add-on logs to see that it successfully ran a backup. I checked QNAP and ensured that the backup was present. As Home Assistant on Proxmox has been much more stable than the Raspberry Pi, I have not yet needed to use any of these backups. However, I have a lot more peace of mind knowing this is running.